The Question: Exactly what could more alluring to a kid than VERY LARGE Food, sometimes half-eaten, and left in a public place?
The Answer: Creating large, half-eaten food, and "leaving" it somewhere utterly inappropriate yourself.
Or at least Making it look that way!
Oldenburg Installations[]
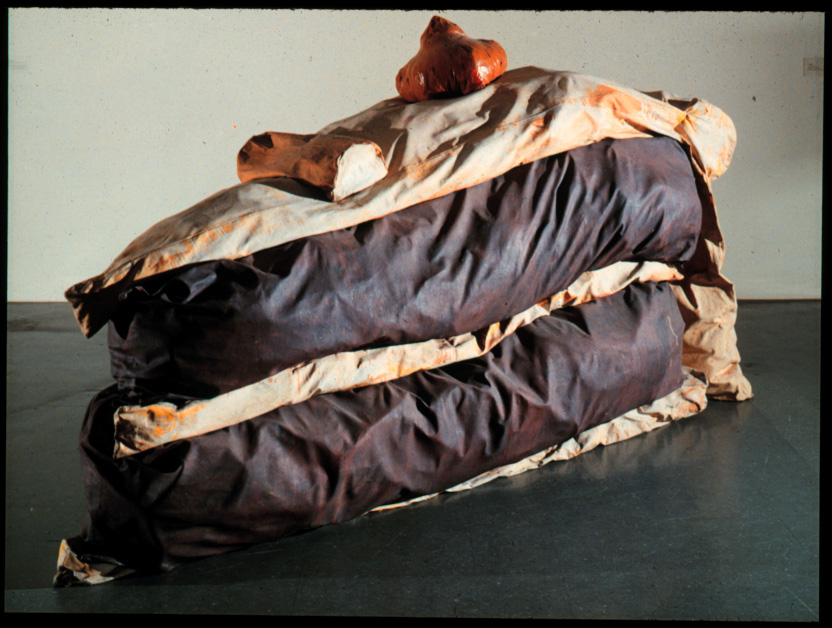
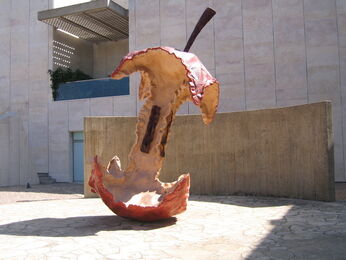
Below are some photographs of Oldenburg installations. In the next section I give some ideas about how to do an Oldenburg project as well as provide some websites and resources.


Okay, NOT food, but cool...

BIG FOOD Art Projects[]
Okay, so if you could make any gigantic sculpture of food or a common small object, what would it be? And where would you put it?
Making the "Food"[]
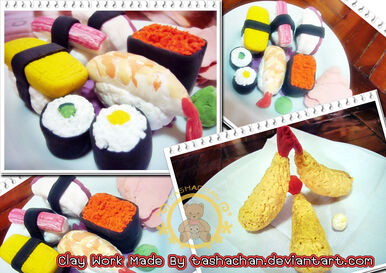
Making food or common household objects into small sculptures (no more than about 6 inches wide) is a managable project for children 7 and up. A great example can be found on the website listed below, a blog posted by an art teacher, Katie, in Pennsylania. Her class used Air Dry Crayola Clay; another good material (with a very textural properties) is polymer clay, such as Sculpey and Fimo. Polymer clay has great colours, transparent white, and is lovely and smooth to the touch (whether these are good properties, depends what you are creating).

For a selection of foods made by thrid grade students see:
Katie's Third Grade Air Clay Food
There are a lots of excellent pictures of polymer food on the web — just have a look under google Images—and many instructions ranging from very detailed to easy projects. Even if you do not want your students to try to make "professional" looking polymer foods, you can get some good tips on things like texturing for a specific food item (how do you make that hamburger bun look soft?).
Here's one nice site for polymer food:
The Shadow Box[]
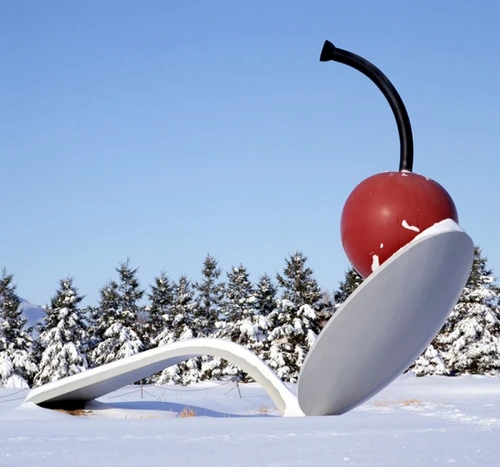
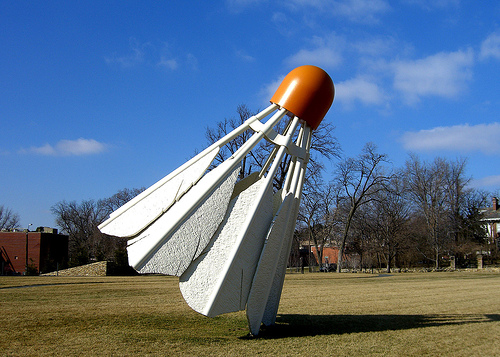
The question is how to get that illusion of big food? One way is to use a shadow box with a photograph of the sculpture's "location". Choose a photograph of where you want to locate your "giant" sculpture, one that has a strong horizontal line, between the background and foreground. For example, look at the actual photograph of the Spoon and Cherry installation, or the Badminion Birdie sculpture. Both photographs are taken "straight on" so the horizon line is perfectly horizontal across the photograph.


Size your photograph to the back panel of the shadow box, so that the horizon line sits on the "fold", between the back panel and the "floor" of the shadow box. Glue your photo in place. If you want, you can make your photograph large enough so that the sides of the photograph wrap around the two sides of the shadow box. (You'll have to cut out squares at the corners in order to accommodate the 3D shape of the box.) Now hot glue your sculpture in place on the "floor" of the shadow box.
So how do you accommodate a larger group of students without using 24 shadow boxes?
- One way is to divide the students into pairs: one can work of the photograph, one can work on sculpture, or both friends can work on both parts.
- Another is to decide on background photographs for shadow boxes large enough to accommodate three or so "gigantic" sculptures. Oldenburg did this himself — by grouping three very large "foods" in a model livingroom. Hamburgers bigger than a couch. Imagine the bleakest of building facades (some ruined Scottish castle) with three kinds of ice cream in front, or three kinds of cake. You can group the shadow boxes into threes as a single art work, or in pairs, etc.
- Yet another idea, in some ways the most practical, is to choose a "monumental" vertical "location" like the Eiffel Tower, and fly food "around" it. That is, suppose you have a large shadow box, which is only about 3 inches deep. Use the back of the box ofr a picture of the, e.g. the Eiffel tower, and then hang your food models with nylon fishing line from the top of the shadow box. Food will appear to be flying past or around the Tower. Pizza? Hot dogs? Cupcakes? Sushi?
Encourage your students to have fun and imagine the incongruous. For example:
- Pair objects with backgrounds they would never have — large popsicles in the desert or a hamburger in front of the Eiffel Tower.
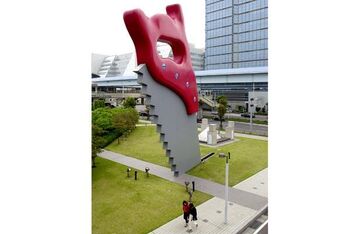
- Like Oldenburg's Saw installation, bury the objects halfway into the ground, or put them upside-down. Take a bite of that cookie, or let the ice cream melt. Remove a "feather" from the badminton birdie. In other words, make the objects the way they would be in ordinary life — or some way they could never be in actual life.
Adjusting the Project to Various Ages[]
Younger students. You can simplify the project in two ways. First, you can choose a food item, and have each child make the same item. However, there should be room for some artistic license for the kids — e.g. they get to decorate their cake or cupcake the way they would like to. Second, younger children will probably not be able to do the background of the shadow box. Rather they should be encouraged to suggest a "place" for their "installation" and other parents, etc. will have to find suitable photographs. The kids will be very interested in the process, however. Make sure they get to see how the photograph is fitted into the shadow box and let them help to clue in. And they can glue in their sculptures — a forest of cupcakes against the background of a clear-cut or....well. whatever...
Older students. This is a project that older students can do almost entirely by themselves. Some of them may know how to use photoshop—they can be the photoshop experts for the class, helping to size the photos, etc. You can use this project as a simple exercise in perspective, by explaining why you need a horizontal horizon line, etc.